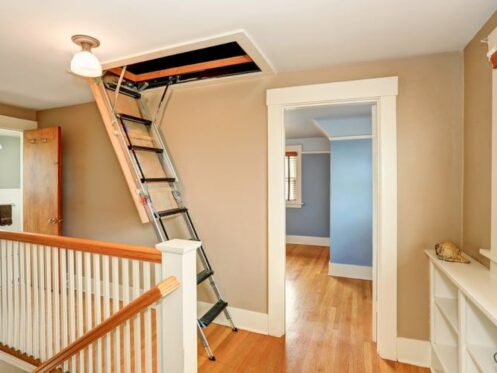
Did you know there’s a big hole in your ceiling?
Well, there probably is. It’s the hole where you enter and exit your attic. You probably have a pull-down hatch with a foldable ladder tucked away on the other side. While these contraptions are handy for entering and exiting your attic, they’re really bad – no, terrible – when it comes to keeping your home properly insulated and sealed against air infiltration.
Let’s consider why that is and how you can solve the problem!
Why attic hatches make your home less energy efficient
To understand why attic hatches are problematic, it’s important to remember that your home has a thermal barrier and an air barrier.
The thermal barrier blocks heat transfer. The air barrier blocks air transfer. Simple, right?
Any insulation you have in your ceiling, walls, or crawlspace is part of the home’s thermal barrier. It keeps in during the winter and out during the summer. Your home’s air barrier, on the other hand, consists of walls, floors, and ceilings. Windows, too. If you’ve got a well-sealed home, it also consists of caulk and spray foam around all the little gaps and cracks in the walls, floors, and ceilings.
You want your home to have solid thermal and air barriers with as few gaps as possible. Unsealed plumbing penetrations, missing insulation, and so on are detrimental to your energy efficiency and comfort.
Now are you starting to see why attic hatches cause problems?
Most attic hatches aren’t insulated. There might be insulation in your attic around the hatch. But not on top of it. They usually aren’t very well sealed either, so air can easily pass around the perimeter of the hatch. Unless you have some kind of gasket, weatherstripping, or insulating foam around the edges of the hatch, it’s a sure thing you’re getting a lot of air infiltration around the hatch door.
By now you might be thinking, “Hey, it’s only a little area that isn’t insulated. No big deal.” But the thing about insulation is that one area of missing material makes a gigantic difference in how well the entire attic is insulated. An insulation thickness difference of 12 inches between one area of your attic and another can result in a 25% decrease in the total R-value of your attic insulation.
In other words, you might think you have R-30 insulation in your attic. But it actually performs more like R-23.
Now imagine how bad things can be when your attic has an area with zero insulation. You know, like your attic hatch.
How to properly insulate and seal your attic hatch
Ok, attic hatches reduce my home’s energy efficiency. They probably cost me money and make me less comfortable. But I’ve got to get into and out of my attic, so what can I do?
Great question! There are different solutions, which we’ll rank in terms of “meh,” “ok,” and “good.”
The “meh” solution for your attic hatch
You can buy an insulated attic hatch to replace the one you’ve got. They usually have a pretty low R value, though. You might see anywhere from R-5 to R-10.
The problem with these is the lower R value compared to the (hopefully!) higher R value of the rest of your attic insulation. Because of the big difference, you’re still reducing the overall R value of your attic insulation by quite a lot.
Also, most of these products aren’t air sealed around the edges. You’ll still have lots of air passage between your attic and your living space.
The “ok” solution for attic hatches
You can make a DIY hatch cover using plywood and a few layers of foam insulation board. Be sure to use at least enough insulation board to equal the R value of the rest of your insulation.
The problem with this method? You’ll also have to install some kind of gasket around the edges to create an air seal. That’s pretty hard to do without leaving gaps. And if you’re using standard foam from the hardware store, it’s likely to wear out over time – even faster in your attic since the wild temperature swings up there can wreak havoc on the adhesive.
The good solution for attic hatches
The best way to solve the attic hatch problem is to get an attic tent! These products form a perfect seal around your attic hatch, so you don’t have to worry about air escaping.
You keep comfortable, conditioned air inside your home while blocking heat transfer and the exchange of attic air. It really is the best solution!
You can install them yourself or, if those sorts of projects aren’t your thing, you can have a pro install it. As far as insulation is concerned, you can add R-30 batt insulation on top of the attic tent to achieve consistent R values across your whole attic.
At PV, we’ve performed thermal imaging tests in homes both with and without attic tents over the attic hatch. For a standard hatch, it’s almost a sure thing that we’re going to see a lot of heat transfer in the area where the stairs drop down. But when there’s an attic tent installed, that heat transfer largely disappears.
The result is a better insulated and sealed attic, lower energy bills, and a more comfortable home!
Wondering how energy efficient your home is?
We can show you! Our home performance team performs rigorous home assessments using a blower door and thermal imaging. We can identify areas where your home isn’t properly sealed and where there’s missing or inadequate insulation. Then we can help you prioritize energy efficiency improvements.
And yes, we can absolutely install an attic tent while we’re at it.
Get in touch with us today to learn more about making your home more energy efficient or to schedule an assessment!

