
As overnight lows in the Atlanta region dip below freezing, more of us are running our furnaces—and running them more often. And we all know what happens when we run our furnaces more frequently.
We pay more money.
Still, you might be thinking, "Why is my gas bill so high?" Even though it's winter, you might not have expected to pay as much as the gas company says you owe.
While gas bills themselves may be inescapable, there are several things you can do to minimize yours this winter. Whether you heat your home with gas furnace or electric heat pump, here are ten surefire ways to minimize your heating costs over the next few months:
1. Bundle up indoors
When you're inside and you feel cold, your first thought might be to bump the thermostat up a degree or two. Not so fast!
You see, you don't want to warm your home. You just want to warm yourself. Any time you reach for the thermostat when you're cold, you're expending a lot of energy to heat the air around you, including the air in rooms you're not using, the objects inside those rooms, and the upper 10 feet of your cathedral-style living room.
Here's another way to think of it. Why use the energy required to heat 16,000 or more cubic feet of space (a typical Atlanta-area home) when you could heat 2.5 cubic feet of space (a typical human body) and be just as comfortable?
All you have to do is put on a sweater. Then, if you're still cold, put on another layer of clothing or curl up under a blanket. Only adjust your thermostat when layers aren't cutting it or you have a compelling need to heat your entire home.
2. Keep your thermostat at 67 degrees or lower
And then put on a light sweater. It'll feel just as cozy as mid-morning in early May. Promise.
If 67 degrees just sounds too darn cold, it might surprise you to learn that most Vermonters set their thermostats to 64 during the winter. And it's colder there - way colder - than it is here in Georgia. Following the New Englanders' lead will save you a whole lot of money on your utility bills.
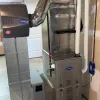
3. Book a furnace or heat pump inspection
All sorts of equipment problems can impact your heating bill. Dirty blower motors, flame sensors, and burners can reduce the efficiency of your furnace and increase energy consumption. If you let them get too dirty, they can even cause furnace failure.
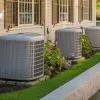
Heat pump users, on the other hand, may experience different kinds of problems. Low refrigerant levels can prevent the system from removing enough heat from the outdoors. As a result, your heat strips will turn on. You'll pay a small fortune to stay warm through the winter.
The best way to avoid these scenarios? Prevention. And the best way to prevent equipment problems is to book a heating system inspection before things get really frigid. A thorough inspection will cover:
- Operational integrity: The furnace or heat pump should be operating properly. There shouldn't be too little or too much heat rise, and the system should be sending heat to the areas that need it when they need it.
- Safety: CO leaks are serious, and they're a risk with every furnace. Preventative maintenance should include a heat exchanger inspection, not to mention CO and gas leak detection.
- Efficiency: Problems with system components - blower motor, blower capacitor, inducer motor, etc. - can reduce efficiency. An effective inspection will include checks on all system components that impact efficiency.
4. Book a home assessment
Want to see where (and to what extent) your home is losing heat? A whole-home assessment can help you pinpoint problem spots and prioritize improvements.
When we talk about home assessments in this context, we're talking about something you might know as an "energy assessment" or "energy audit." Thorough home assessments will cover more than just energy use but improving energy efficiency is almost always a major focus of the exercise.
The best tactics for minimizing energy consumption throughout the year almost always have to do with:
- Sealing off air leaks that exchange large volumes of air with the outdoors
- Improving your home's thermal performance by adding or replacing insulation
- Optimizing ductwork by sealing off leaks, insulating properly, and/or bringing the surrounding space into your home's envelope
So, when a home performance contractor completes an assessment, they'll typically suggest that you…
5. Air seal at the top and bottom of the envelope
Because of the stack effect (and reverse stack effect!), most air enters and leaves your home from the top and the bottom of the structure. In the Atlanta area, the "bottom" is usually a crawlspace or basement. The "top," of course, refers to your attic. More often than not, these are the areas you need to seal to keep warm air indoors during the winter and out during the summer.
When you run your furnace, a lot of the warm air inside your home weasels its way through little gaps and cracks between your ceiling and your attic. Plumbing, wiring, ductwork, bath fans, recessed lighting… if you haven't caulked or foamed around these ceiling penetrations, the warm air you're paying for definitely is escaping through them.
6. Add insulation
If your insulation isn't compliant with modern codes (i.e. not enough insulation), old and subject to settling, or simply missing in the places where you need it, adding additional insulation can increase your home's thermal performance and help you stay warm through winter. Of course, you'll need to make sure you:
Air seal in addition to insulating; insulation blocks the transfer of heat, but it doesn't stop air movement.
Add it where you need it; while it might be tempting to add insulation to wall cavities where you know it's missing, increasing the amount of insulation in, say… your attic might be more effective. A comprehensive home assessment will tell you where it makes the most sense to add insulation.
7. Encapsulate your crawlspace
Does your indoor HVAC unit live in your crawlspace? Then you're probably losing a lot of energy down there.
Typically vented crawlspaces, by design, allow lots of outdoor air to come in contact with your HVAC system and ductwork. That means much of the heat being contained by your (presumably) insulated ducts is lost a whole lot quicker than it would be if those same ducts lived in an air-sealed environment within the building envelope. Encapsulation solves that problem.
Assuming you encapsulate your crawlspace the right way, you'll not only seal the area off from the outdoors - you'll also eliminate all major air leaks between your crawlspace and your living space. Less cold air replaces your conditioned air. Less heat is lost.
Note: If you have a standard, 80% furnace in your crawlspace, just be sure you'll still have enough air circulation for safe combustion following the encapsulation. Your contractor should always use a confined space formula to determine whether it's ok to encapsulate a crawlspace that contains an atmospheric combustion furnace. Even if it's deemed safe, remember to keep a good carbon monoxide detector in your home.
8. Got multiple HVAC systems or zones? Use them.
When you have two or more HVAC zones or multiple systems that serve different parts of your home, be proactive about using them. Otherwise, you may be paying to heat space that you don't need to heat.
For example, if you live in a two-story home with upstairs bedrooms, keep the upstairs rooms at a comfortable sleeping temperature (between 62 and 65, say) while setting the downstairs temperature to something lower - like 60 degrees. You can do the same thing when you're gone for work during the day, only this time you might set the whole house below 65.
Of course, you'll need to be mindful of the potential pitfalls of an individual system with multiple zones. If, say… you close your bedroom doors at night, you could create a negative pressure environment in your home (not enough conditioned air getting to the return). As a result, you'll increase air infiltration and force your furnace to run even more - the exact opposite of what you wanted!
9. Heat pump users: Avoid the heat strip penalty
If you don't have a gas furnace, then you probably have an electric heat pump. Heat pumps are great… until it gets really cold outside. When the outdoor temperature drops below 40 or so, most heat pumps struggle to extract the amount of heat required to satisfy your thermostat setting.
To keep you comfortable, the system resorts to heat strips. Also known as electric resistance heating, this part of your indoor unit is like a giant toaster that heats your home. You'll know your heat strips are in use when you see your thermostat cut over to "auxiliary heat" or "emergency heat."
Heat strips can keep you warm, but they're horrendously inefficient. The good news? You can minimize the use of heat strips by:
- Not setting your thermostat above 67 (see tip #2 above); that way, the heat strips are less likely to come on.
- Turning your thermostat down during the night when it's coldest and heat strips are most likely to be needed
- Programming your thermostat in small increments; you'll need to check your owner's manual, but many thermostats automatically turn on heat strips when you increase the thermostat setting by more than a couple of degrees. To reduce heat stip usage, program your thermostat to increase temperature one or two degrees at a time.
Installing a lockout sensor that turns off your heat strips any time the outdoor temperature is higher than a certain preset… like 40 degrees.
10. Build a fire
Everyone loves a crackling fire in the fireplace! Aesthetic and sonic pleasures aside, building a fire helps heat your home and gives your HVAC system a break.
It's not a very big break, but it's something. And when you're trying to reduce your heating bill, every little bit counts.
Remember, even a simple fireplace fire has the potential to push carbon monoxide into your home. Just check that your CO detector is in working order, and you should be in good shape.
Conclusion: There are lots of reasons why your gas bill might be so high
And there are also lots of ways to reduce it!
If you're concerned about energy usage in your Atlanta area home, PV Heating, Cooling & Plumbing can help! Call us today at (404) 798-9672 or schedule service online!